
“], “filter”: { “nextExceptions”: “img, blockquote, div”, “nextContainsExceptions”: “img, blockquote, a.btn, a.o-button”} }”>
Heading out the door? Read this article on the new Outside+ app available now on iOS devices for members!
>”,”name”:”in-content-cta”,”type”:”link”}}”>Download the app.
No shade, but why do so many vinyasa classes include a core strength section complete with crunches, sit ups, and bicycles? Are these exercises effective in building core strength? Absolutely! Are these movements typically less intimidating to beginners who aren’t yet as familiar with yoga asana (poses)? For sure!
But I still think it’s unnecessary. Here’s the thing: every single posture in a vinyasa class has the potential to strengthen the core. The full-body strength needed to hold most yoga poses, in addition to the subtle engagement and pelvic floor activation of the bandhas, is inherently core activating—and, at times, challenging to access. Which is where core strength yoga comes into play.
You can sequence and enjoy a core-focused yoga class without dropping onto your back and busting out a set of sit-ups in the middle of your flow.
Don’t believe me? These poses will fire up your core in your next home practice.
12 Dynamic Poses for Core Strength
When you rely on blocks to support your practice, particularly with compression work (aka two body parts pressing together in a pose), you can choose from any of three levels. Typically, the higher the block position, the more assistance you’ll experience; the lower the setting, the more challenge you’ll create. Choose accordingly—and have two blocks handy.
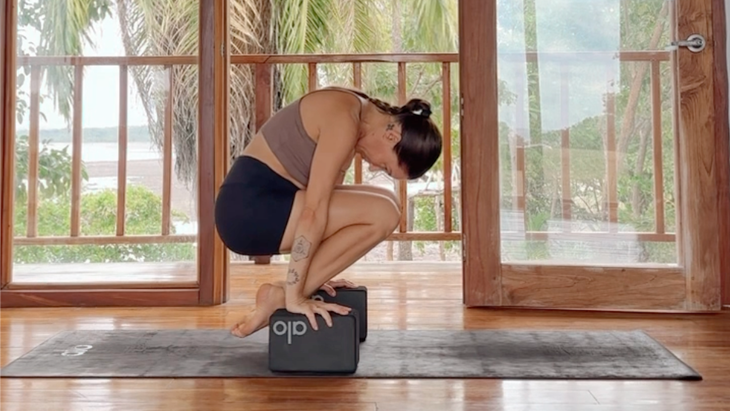
1. Lolasana Lifts
Start by sitting on your heels with your toes untucked and your knees as wide as your hips. If you’re new to Lolasana, place a block on the highest setting outside each leg. Otherwise, place blocks on the medium or low setting.
Inhale and place your hands firmly onto blocks, and sit up tall. Exhale into your Lolasana lift by curling your upper body (as in Cat) while lifting the shins off of the mat. Press into the hands and draw your nose and knees together.
As you inhale, lower down and arch your spine (as in Cow) to counter the curl.
Repeat as many times as you’d like.
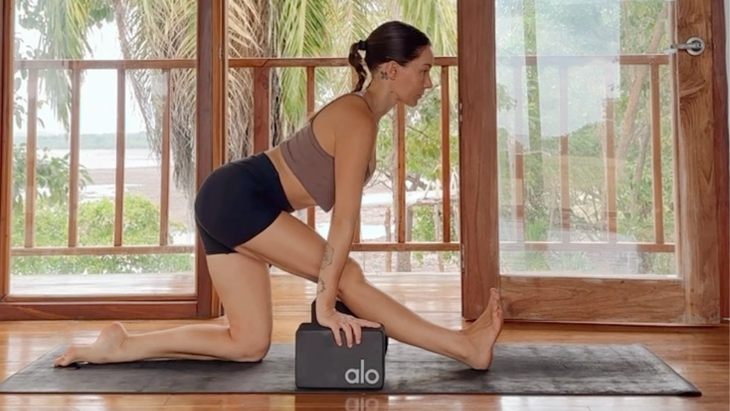
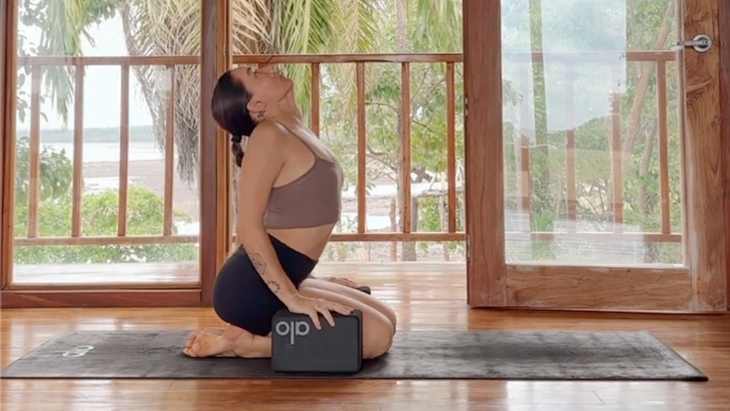
2. Half Splits Lifts
Start in a kneeling position. Place a blocks on each side of your mat. Rise so your hips are over your knees and extend your right foot forward, flexed so your heel is grounded.
With an inhalation, take a halfway lift in Half Splits by easing the chest forward and tail backward as you deeply flex the right foot.
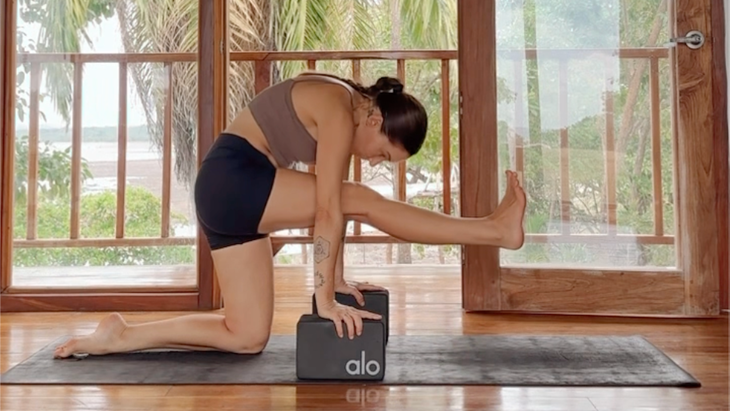
With an exhalation, move into Half Splits. Lift by curling the pelvis underneath you to compress and lift your right heel off the mat. Press deeply into the blocks to spread your shoulder blades.
Inhale as you lower your foot and lengthen your spine. On your exhalation, lift. Repeat as many times as you’d like before repeating on the opposite side.
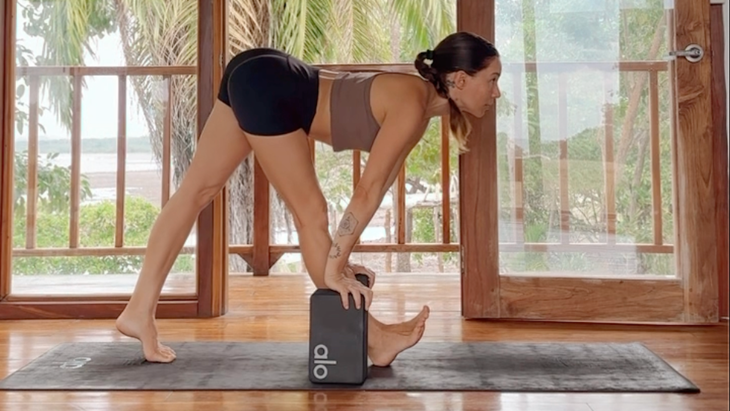
3. Modified Pyramid Lifts
Start in a standing position at the back of your mat. Step your right foot forward and lift your back heel to create space along the back of your body. Place blocks on either side of your mat, on any level, under or just behind your shoulders. Place your hands on the blocks.
With an inhalation, lift halfway in a modified Pyramid Pose by pulling your chest forward and away from the tailbone, creating a straight, strong line through your spine.
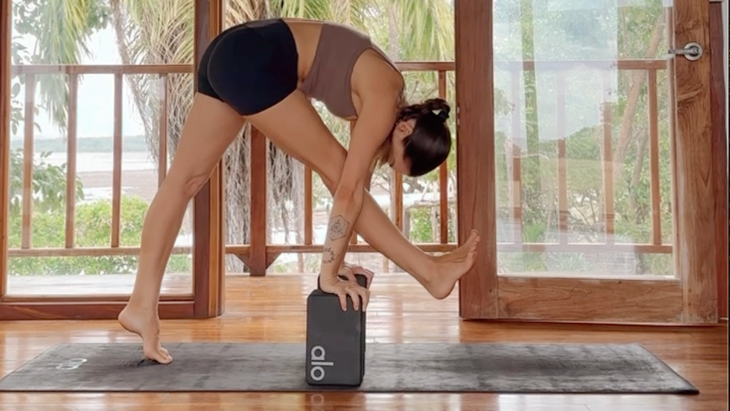
Exhale into Modified Pyramid Lift by scooping the pelvis under and rounding your back, as in Cat, while lifting your right foot off the mat. Press your hands into the blocks to give you more of a lift and help your shoulders blades spread.
Repeat as many times as you’d like. Then move to the opposite side.
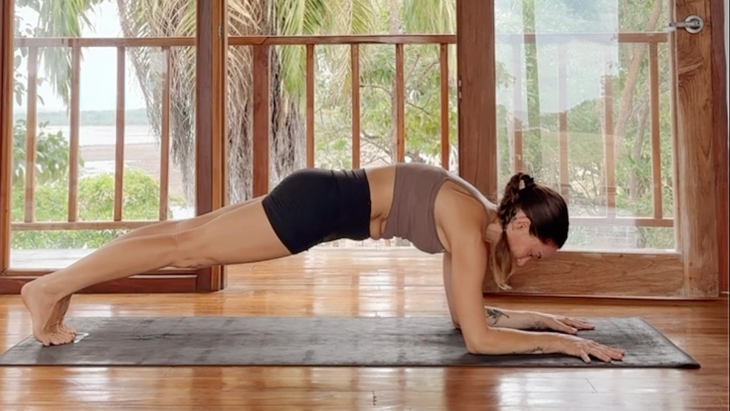
4. Forearm Plank
Start on your belly. Place your forearms on the mat shoulder-distance apart.Press firmly into your forearms, engage your core, and lift your hips into Forearm Plank. Press your heels straight back and draw your kneecaps toward your hips, creating a long line from your heels to the crown of your head.
Feel free to bring your hands together and interlace your fingers in the center of the mat for more stability or to create more space in your chest and shoulders if they feel tight with your arms parallel.
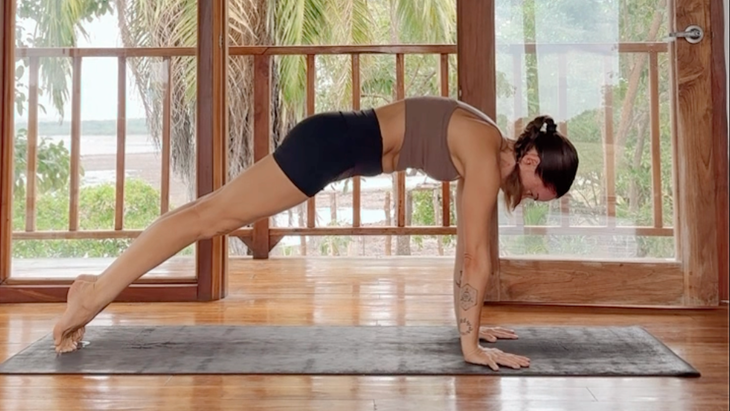
5. Plank
Place your hands underneath your shoulders, clawing into the mat with all 10 fingers in order to maintain an active grip strength with your hands in Plank Pose. Press the mat away from you until you feel your shoulders slightly dome and lift.
Tuck the pelvis underneath you, as you would in Cat, allowing the low belly to hug up and in. Squeeze the glutes as you press back through the heels.
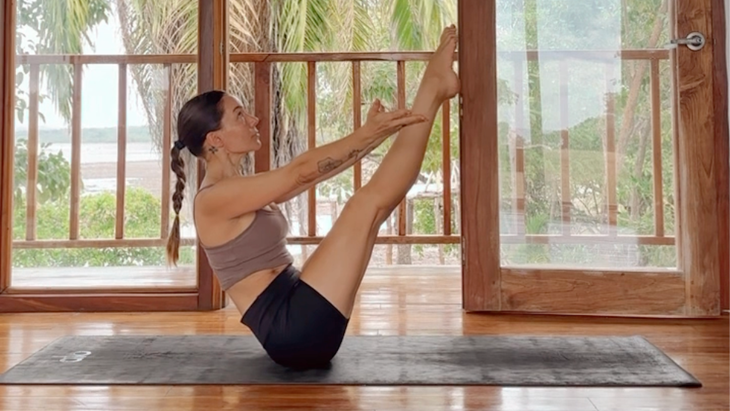
6. Boat Pose
Start on your bum with your knees bent and feet planted on the mat. Reach your arms forward, palms facing up, engage your core, and lift your feet off the mat in Boat Pose. Point your toes. Feel free to keep your knees super bent, particularly if straightening them long causes you to round forward or lean backward.
Do your best to stay upright and keep a straight spine by pressing your chest toward your knees and hugging your shoulders together behind your heart. Work on compressing the thighs toward your belly to activate your pelvic floor and strengthen the hip flexors and deep core muscles.
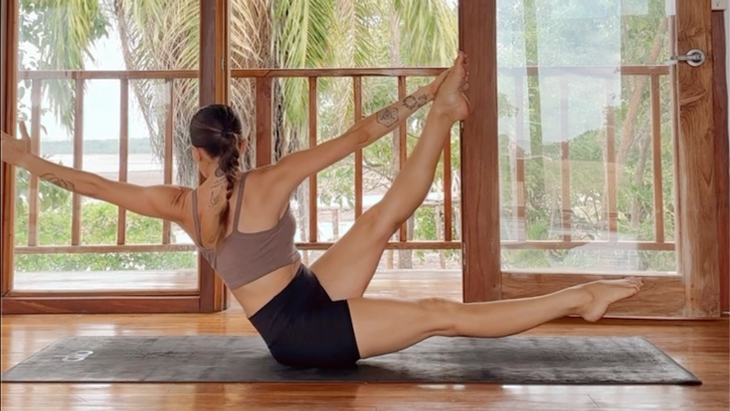
7. Twisted Boat Pose
Start in Boat Pose. Use an inhalation to sit up taller, lowering one or both legs to hover over the mat.
Exhale into your Twisted Boat Pose by reaching one hand toward the opposite foot or leg as you reach your other arm behind you. Look back over your shoulder to complete the twist.
Continue to breathe as you stay here or switch through center, moving from side to side with the breath in order to strengthen your obliques and hip flexors.
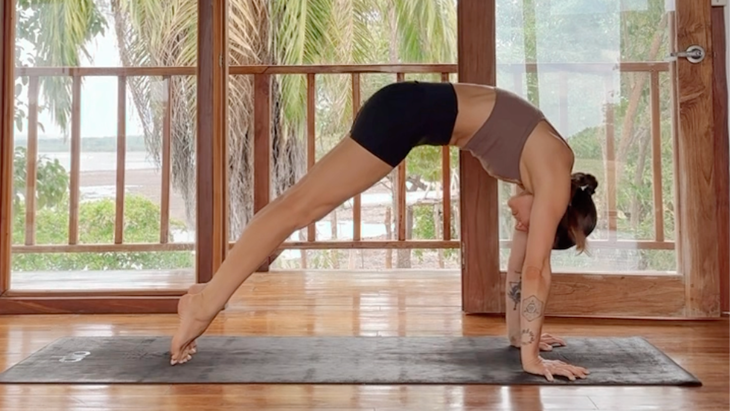
8. Tiny Ball to Side Plank
Start in Downward Facing Dog. On an inhalation, roll forward to Plank, puffing up your back body.

Exhale into your Tiny Ball by turning your chest toward the right, shifting your weight to your left hand, spinning your heels to the left, and moving through Side Plank before sinking your hips back by your heels. Tuck your right elbow toward your left knee.

With an inhalation, come back into Side Plank and lift your right arm and left hip high, feeling free to stack your feet or keep them staggered.
Repeat as many times as you’d like, making sure to repeat on the opposite side.
9. Side Plank Scoops
Start in Side Plank on either side with your feet staggered on the mat for stability. Inhale as you reach your top arm higher. Exhale as you wrap your top arm underneath your body while staying lifted in Side Plank. Engage your obliques and core to stabilize through your center.
Inhale as you reach lift up again. Exhale to scoop under.
Repeat as many times as you’d like. Repeat on the opposite side.
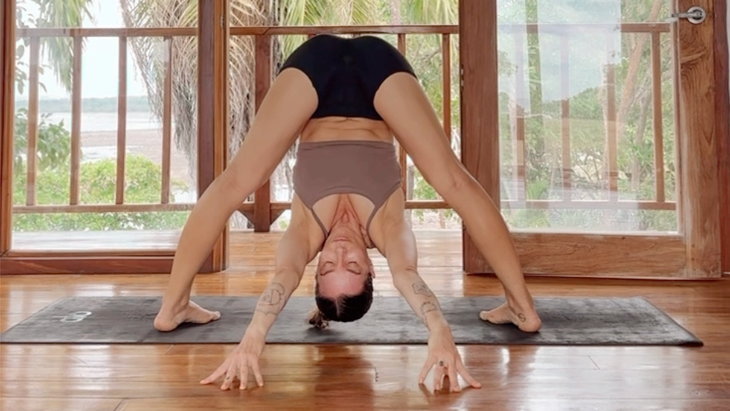
10. Wide-Legged Compression Fold
Start in Wide-Legged Forward Fold. Step your feet wide. Turn your toes slightly inward, hinge forward at your waist, and bring your torso between your thighs.
Inhale into a Halfway Lift. Press your hands or fingertips into the floor beneath your face and create a long spine by tugging your tail back and spreading your collarbone forward.
With an exhalation, move toward your Wide-Legged Compression Fold. Walk your hands through your legs so your fingers point away from you and your thumbs point toward your face. As you fully empty your breath, use the exhalation to deepen the fold. Engage your quads to help you fold more deeply using your core and leg strength.
Continue to breathe as you spill some of your weight forward to the balls of your feet while simultaneously pressing down through the heels to keep the calves active. Spiral your inner thighs out and back behind you to deepen sensation along the back body.
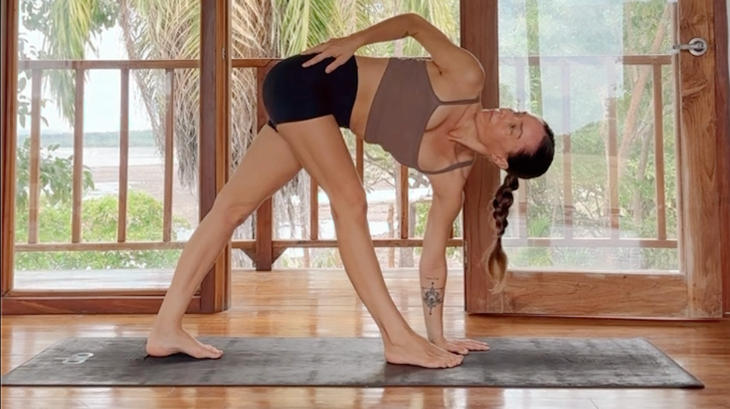
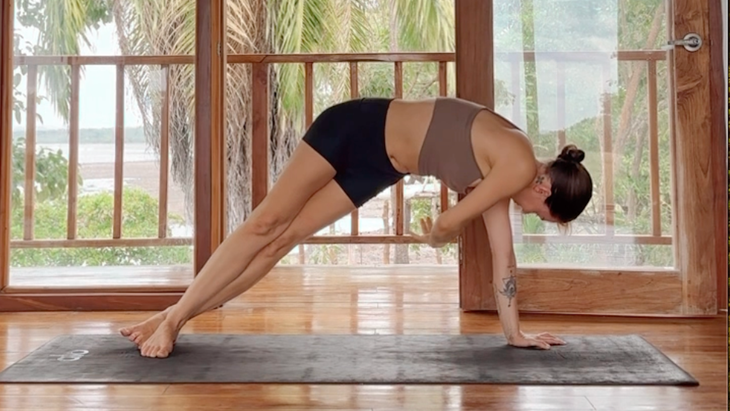
11. Revolved Pyramid
Start in a standing position at the back of your mat. Step your right foot forward into Pyramid, keeping your left heel pressed down behind you. Make sure that all ten toes point forward, or, for more space, point the back toes slightly to the left or lift your left heel.
With an inhalation, lift halfway and lengthen the spine. With an exhalation, move into Revolved Pyramid by twisting to the right and stacking your right shoulder over your left. Feel free to keep your right hand on your low back to keep your hips level or deepen the twist by reaching your right arm toward the ceiling.
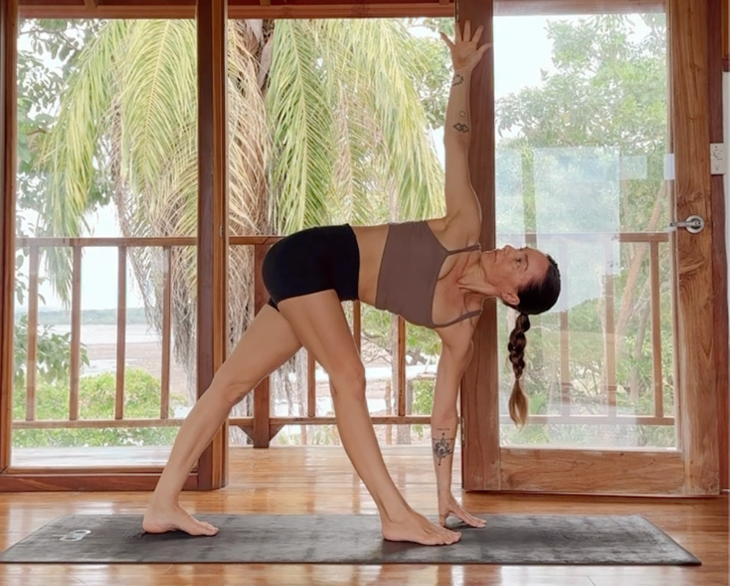
As you continue to breathe, work on drawing your outer right hip toward the back wall as you nudge the top of your left hip forward. Work on rotating the right side of your ribcage up and the left ribcage beneath you. Ensure that the twist is coming from your belly and not your upper back. Switch sides.
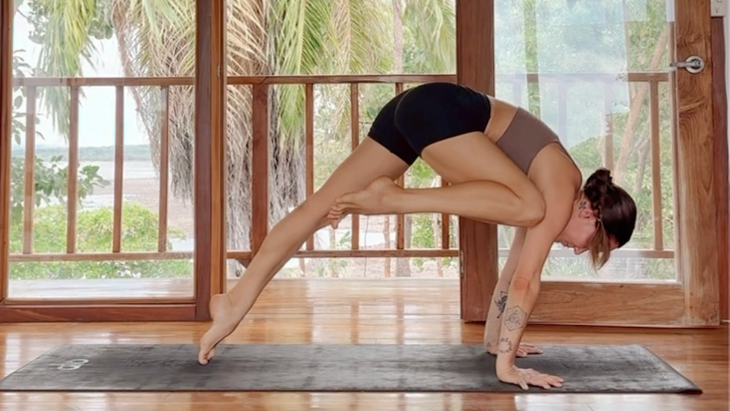
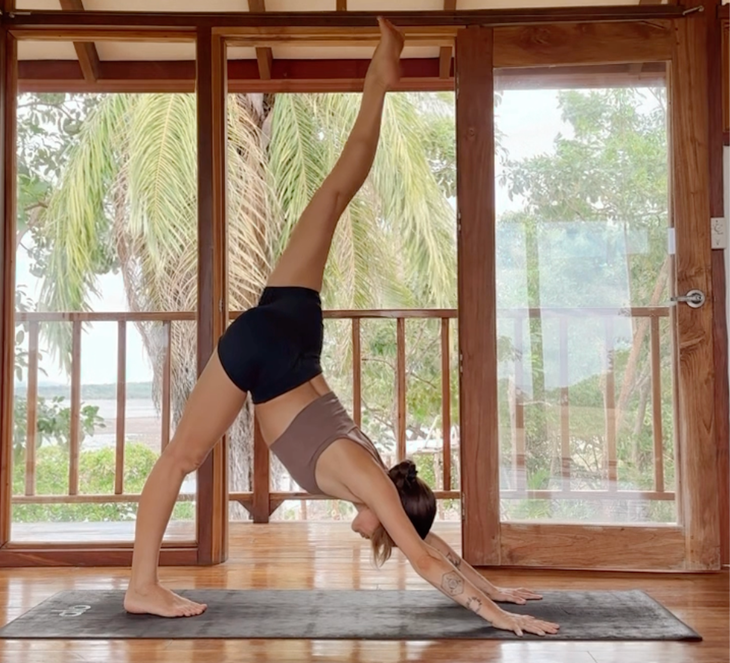
12. Tiger Curl Variations
Start in Downward-Facing Dog. With an inhalation, lift your right leg in Three-Legged Dog. With an exhalation, draw your right knee to your nose, rounding your back and scooping the pelvis to engage the low belly.
Inhale back to Three-Legged Dog. With an exhalation, draw your right knee to your right shoulder.
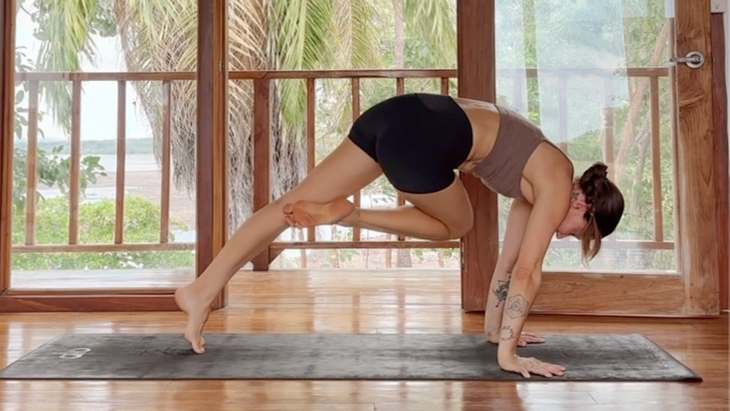
Inhale back to Three-Legged Dog. With an exhalation, draw your right knee to your left shoulder, crossing your right knee beneath your body and keeping it lifted as high as possible. At the same time,draw your tailbone underneath you to engage your belly and obliques are active.
Repeat this sequence as many times as you’d like. Make sure to repeat it on the opposite side.

